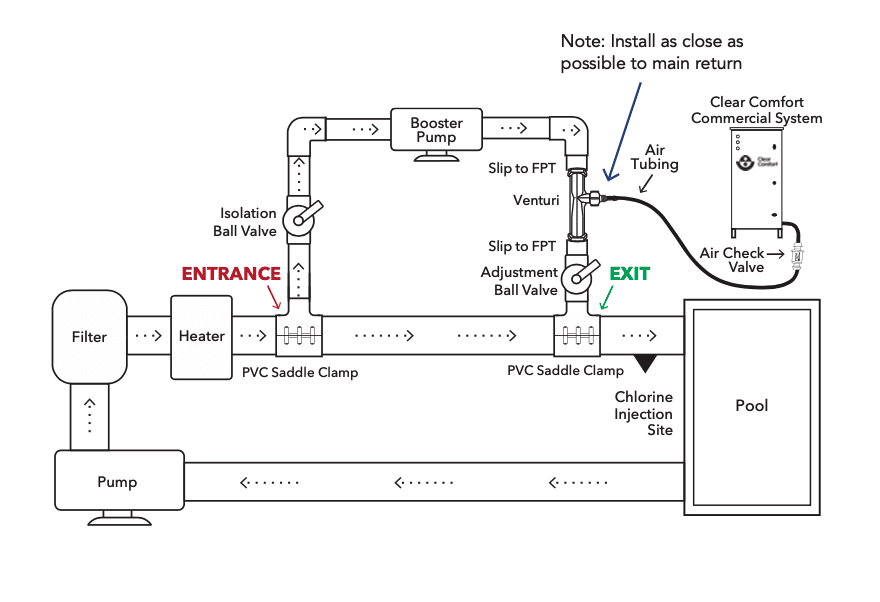
Full System Diagram With Booster Pump #
Connecting System and Venturi Loop #
- Turn main pool pump OFF and switch OFF the main pool circuit breaker.
- Close water main valves before and after injection site to isolate water from pool (if applicable).
- Locate section of existing plumbing in which you choose to install the ENTRANCE leg connecting the main line of flow to the venturi bypass pump. See Figure above – please note: entrance leg may be positioned after the heater.
- Locate section of existing plumbing in which you choose to install the EXIT leg from the venturi bypass. Location should be in any accessible area after the filter and heater (if equipped) on the main line as water is returning to the pool, and BEFORE the chlorine/ bromine injection site. See the diagram above for location.
- Venturi injector MUST be positioned as close as possible to the main line at the end of the exit leg to allow maximum water contact with hydroxyls.
- EXIT leg should be as far upstream as possible from chlorine injection location in main line.
- Connect ENTRANCE leg to the suction side of bypass booster pump. The bypass booster pump shall be secured in a dry and protected area free of water. Placement on floor is recommended.
- Connect pressure side of bypass booster pump to 1.5” venturi (provided).
- MAKE CERTAIN THE VENTURI IS INSTALLED WITH THE FLOW MARK IN THE PROPER DIRECTION. IF REVERSED IT WILL NOT OPERATE.
- Connect venturi to EXIT leg of bypass returning flow to main pool return line.
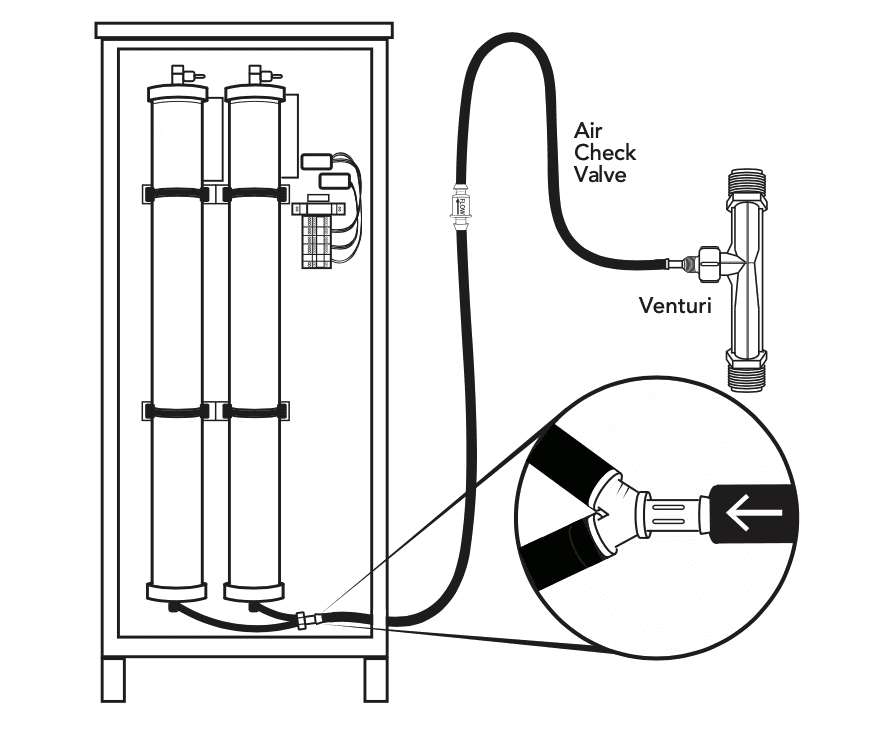
- Run the desired length of 1⁄4” silicone tubing from the venturi injection port to the straight barb fitting within the Clear Comfort system. Distance should be no longer than 15 feet. See Figure below.

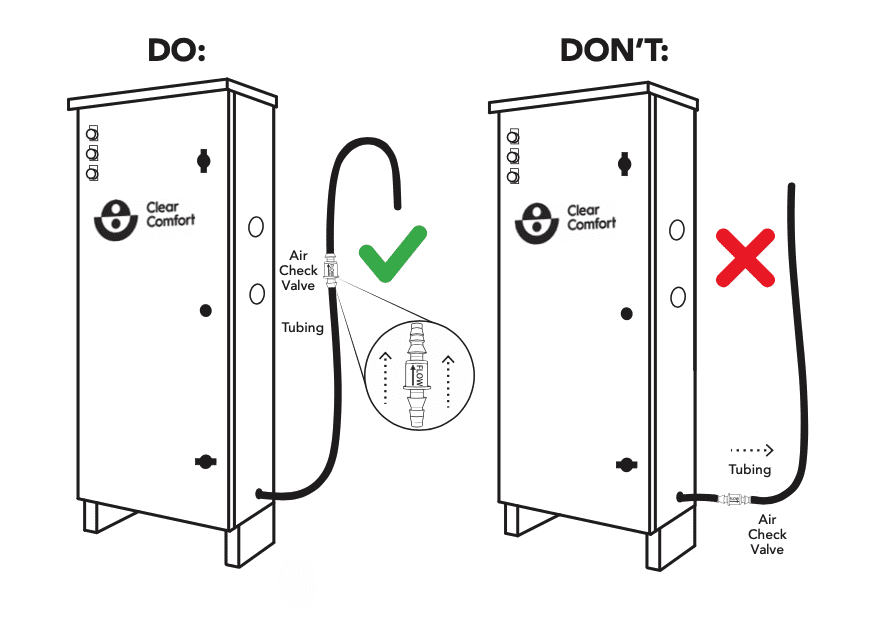
Venturi Connection - Install 1⁄4” one-way check valve (supplied) in-between the Clear Comfort system to eliminate any potential water back flow. Check valve should be oriented in a vertical orientation. See Figure above for details.

Air Check Valve Position
Operating Instructions #
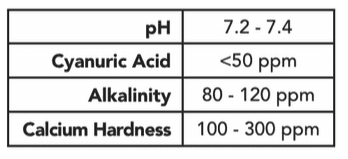
- Adjust pool pH, Cyanuric Acid, Alkalinity, Calcium Hardness to correct operating levels.

- Open valve isolating the venturi injection site from main pool water (if applicable)
- Turn pool/spa pump and filtration systems on. Ensure proper function and note/fix any leaks that may have occurred during venturi installation.
- Turn ON bypass booster pump.
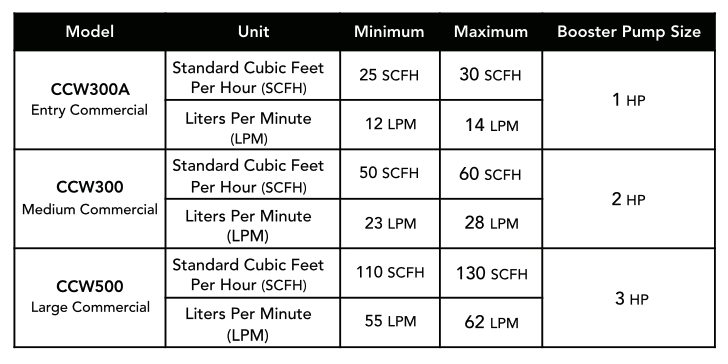
- Using an airflow meter, ensure air suction is in the following ranges:

- Close the front door of the Clear Comfort system, turn latch lock to the closed position, and toggle red power button to the ON position. LED will illuminate.
- The blue LEDs will also illuminate indicating that each cartridge is operating properly.
- At this point, the Clear Comfort system should be functioning, and thus applying treated air to the recirculating water via the venturi injector.
- Check for bubbles in pool return jets — the water entering the pool/ spa will inject thousands of entrained bubbles.