Video: Air Check Valve Replacement #
#
How to Replace Your Air Check Valve #
Important Note: The Air Check Valve must be replaced annually to prevent water backflow into the cartridge. Failure to replace it may void the warranty.
What’s Included? #
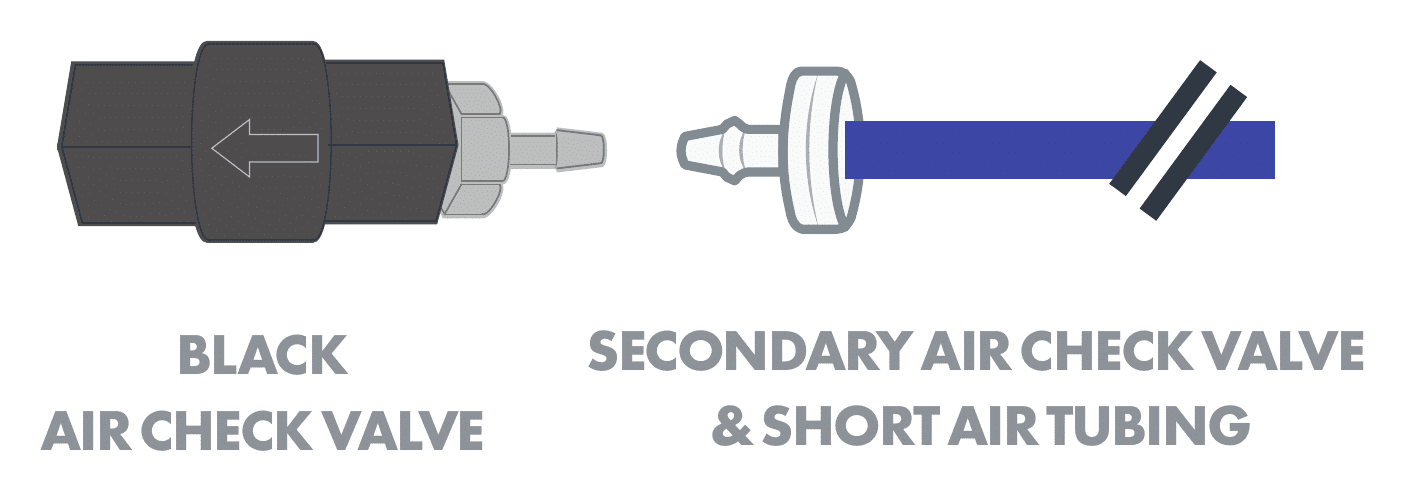
- Black Air Check Valve
- Secondary Air Check Valve & Short Air Tubing
- Step 1: Remove Old Air Check Valve
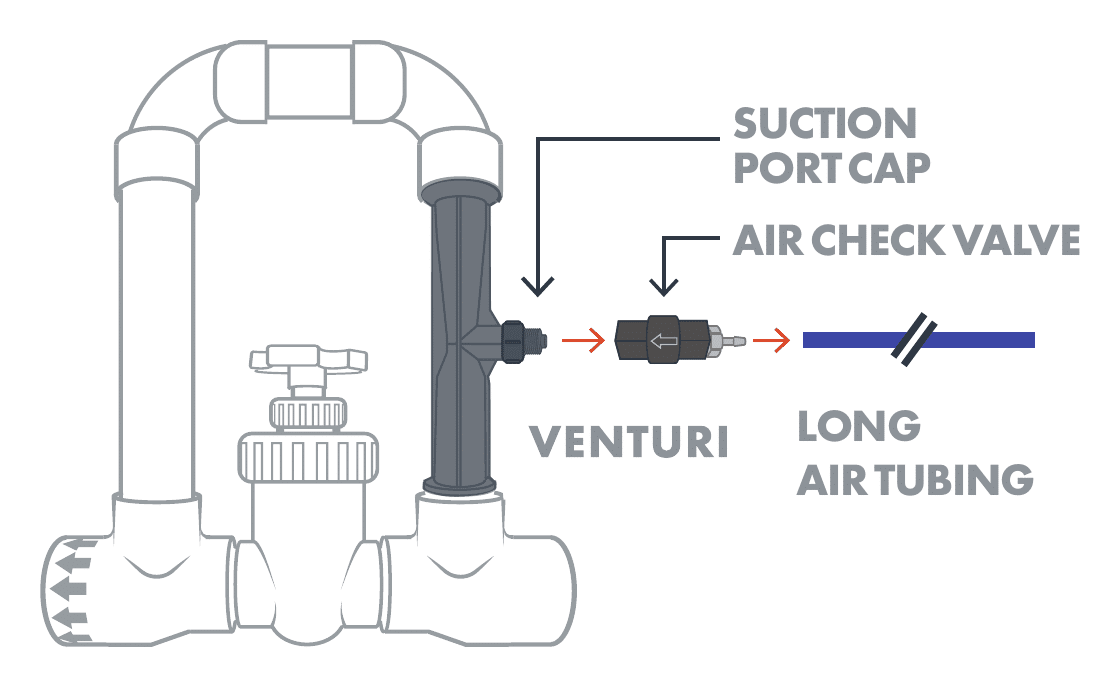
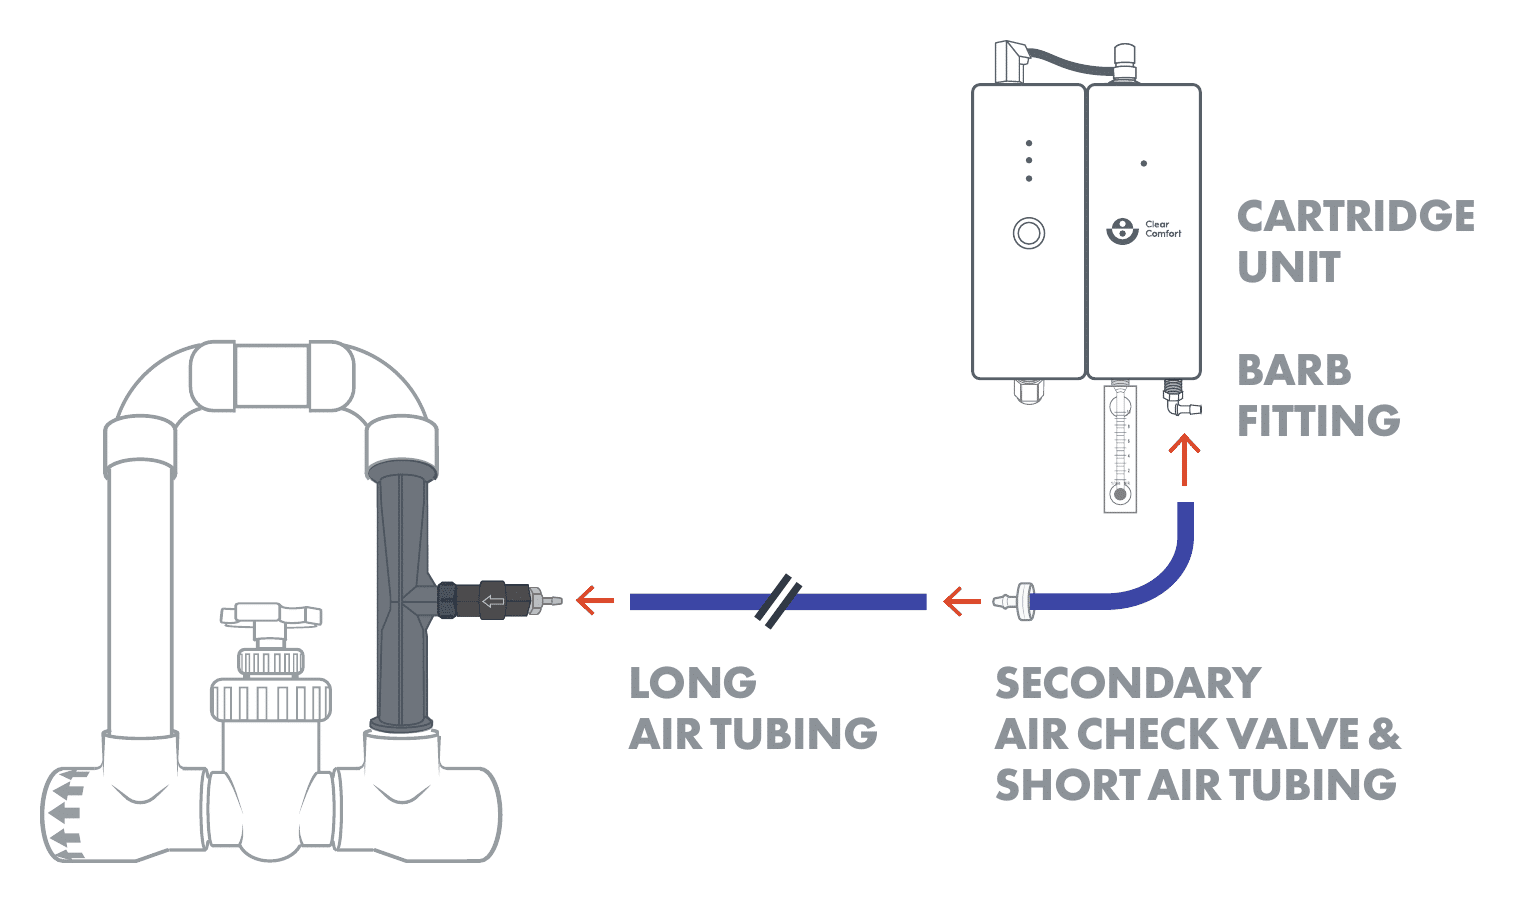
- Disconnect long Air Tubing from old Air Check Valve
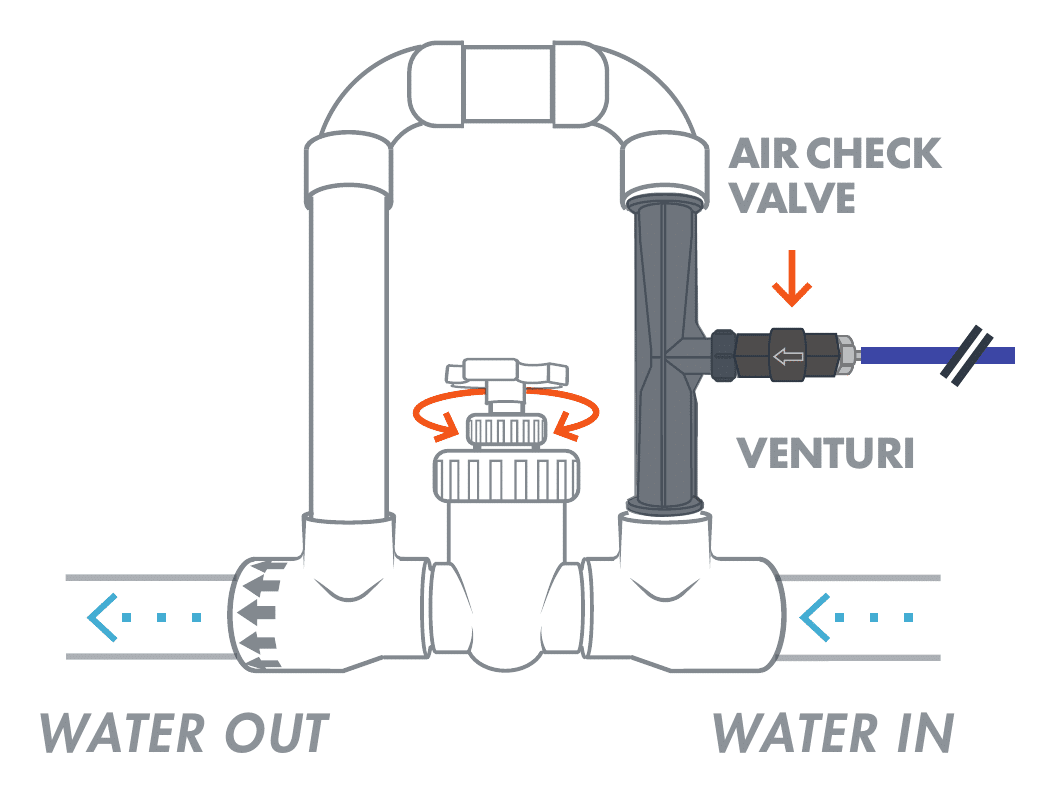
- Unthread old Air Check Valve from the Venturi
- Caution: If the Venturi’s black Suction Port Cap detaches with the old Air Check Valve, unthread it & reattach it back to the Venturi.

- Step 2: Install New Air Check Valve
- Thread the new black Air Check Valve with the included Barbed Fitting onto the Manifold’s Venturi Suction Port Cap.
- Important Note: Ensure the Air Check Valve’s arrow points to the Manifold & away from the Cartridge

- Thread the new black Air Check Valve with the included Barbed Fitting onto the Manifold’s Venturi Suction Port Cap.
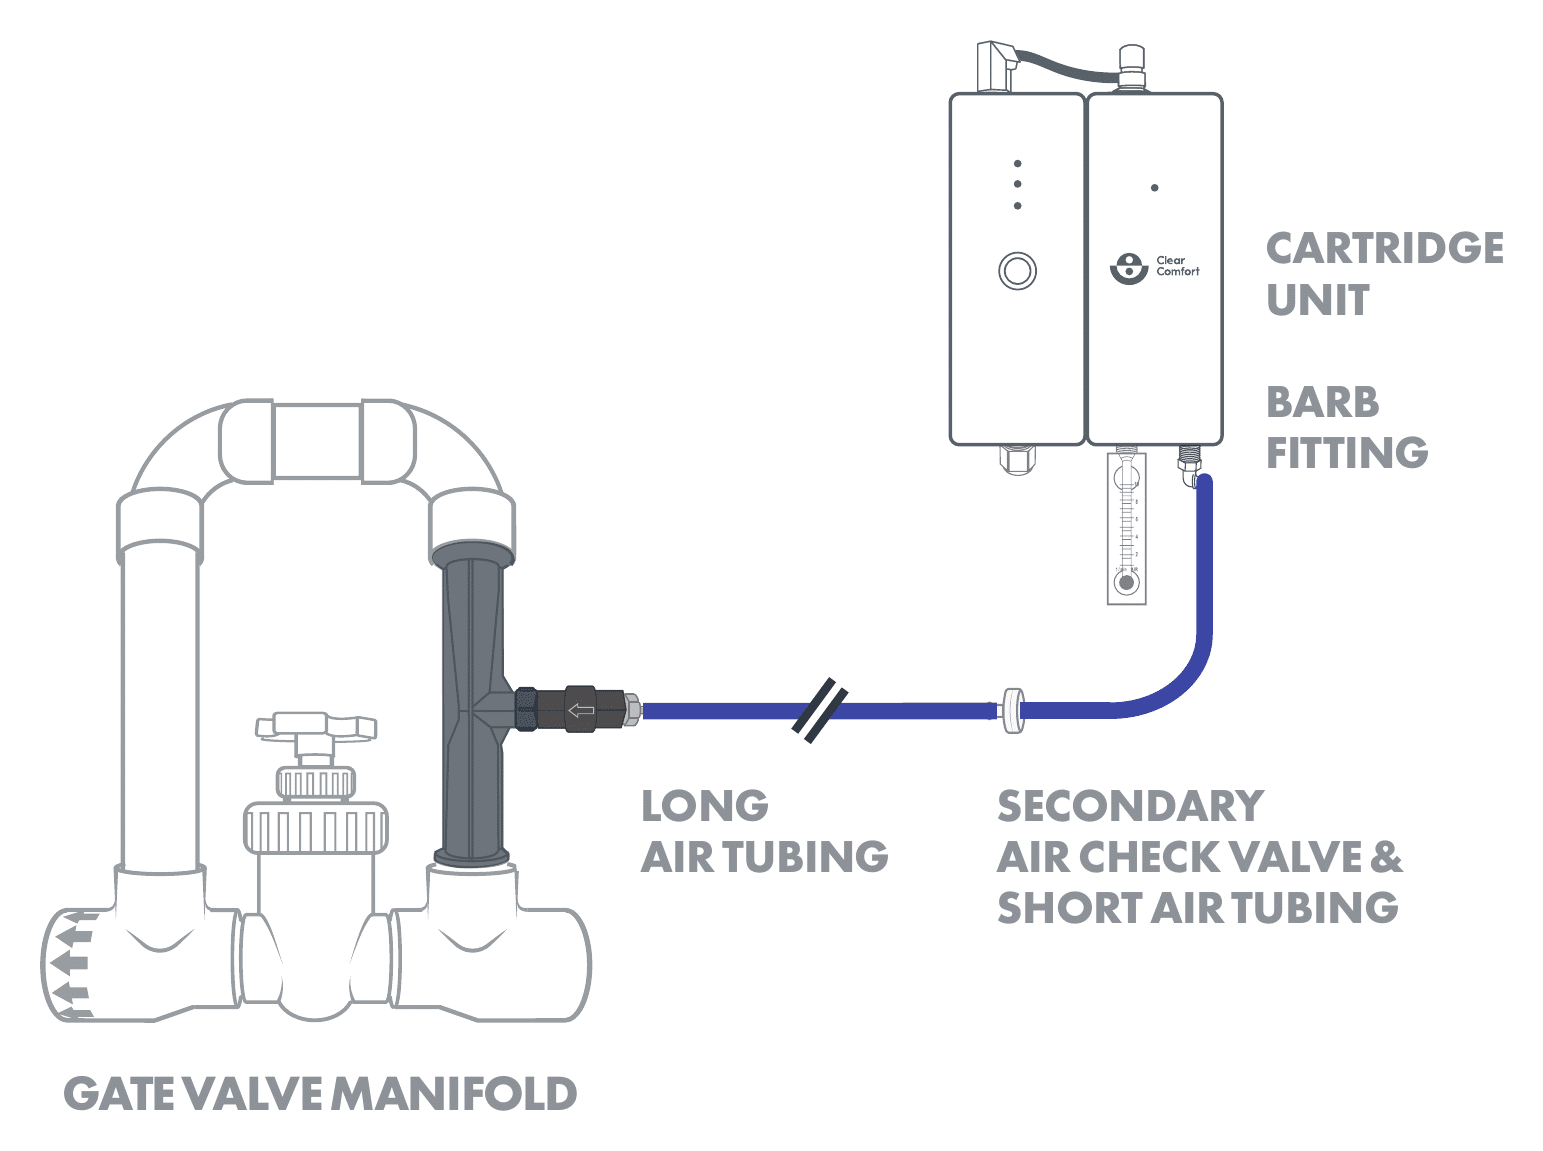
- Step 3: Install Secondary Air Check Valve
- Connect the Long Air Tubing from the new Black Air Check Valve to the secondary Air Check Valve
- Connect the secondary Air Check Valve Short Air Tubing to the Cartridge Unit’s Barb Fitting.

- Step 4: Set Required Air Flow Rate
- Turn on circulation pump & adjust the Manifold’s knob until the Flowmeter meets the recommended flow rate:
- CCW100: 5-7 LPM
- CCW50: 3-5 LPM

- Turn on circulation pump & adjust the Manifold’s knob until the Flowmeter meets the recommended flow rate:
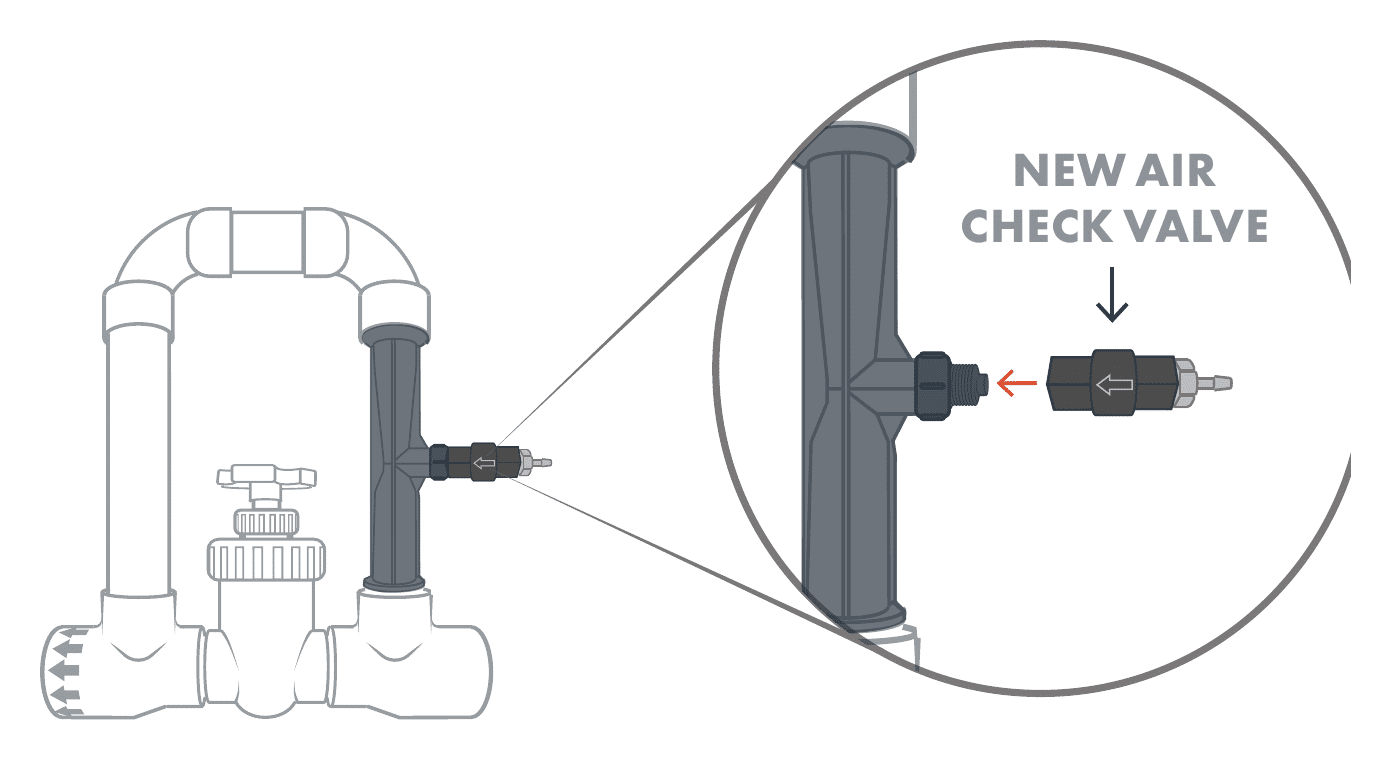
After: Manifold #
Here’s what the Manifold looks like with the new black Air Check Valve.